

A full-stack development workflow is the step-by-step path a project follows from the first idea to a live, working application. Many beginners learn HTML, JavaScript and databases but still feel lost when they start a real project, because nobody showed them the order in which things should happen. A clear workflow solves that problem.
In this guide, you will learn what a full-stack development workflow is, why it saves time, and the seven easy steps that take a project from planning to deployment. You will also see the tools used at every stage, a simple real example and the mistakes that slow beginners down.
If you are new to the field, read our Introduction to Full-Stack Development first, and keep our guide on Front-End and Back-End Integration open for reference.
Table of Contents
What Is a Full-Stack Development Workflow?
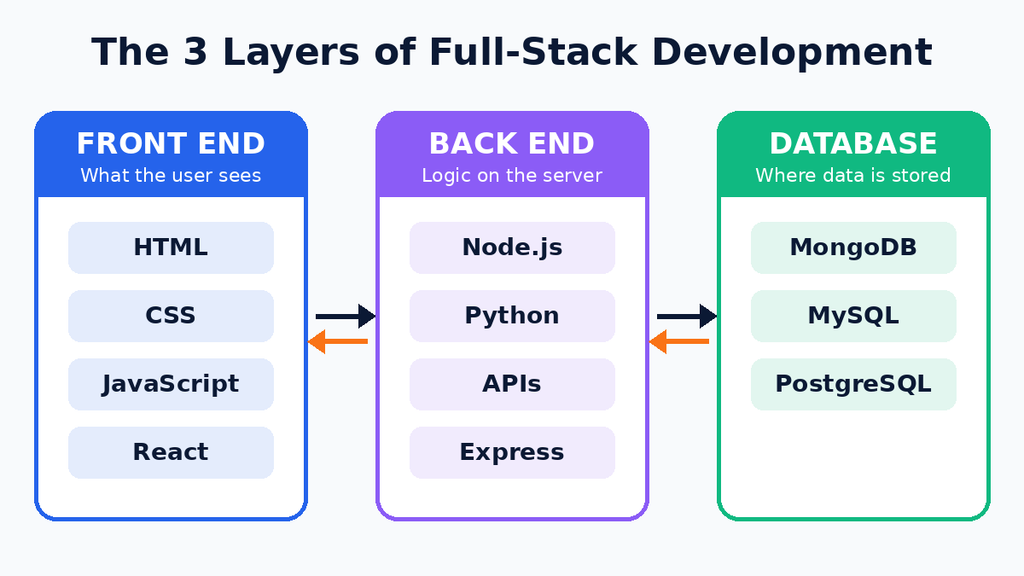
A full-stack development workflow is the organised sequence of tasks used to plan, build, test, release and maintain a web application that has a front end, a back end and a database. It tells you what to do first, what to do next and how to check that each part works before moving on.
Think of building a house. You do not start by painting the walls. First you plan, then you draw the design, lay the foundation, build the structure, check everything and only then hand over the keys. A full-stack development workflow brings the same order to software, so you avoid rebuilding things that were done in the wrong sequence.
Every team has its own version, but the main stages are almost always the same: plan, design, set up, build, test, deploy and maintain.https://www.coursera.org/articles/full-stack-developer
Why a Clear Full-Stack Development Workflow Matters
Working without a plan feels fast at the start and becomes painful later. A good full-stack development workflow gives you these benefits:
- Less wasted time: you decide the features and data first, so you do not rewrite code again and again.
- Fewer bugs: testing is part of the process, so problems are found early, when they are cheap to fix.
- Better teamwork: everyone knows who does what and when, which prevents confusion between front-end and back-end developers.
- Easier changes: a well-organised project is simple to update when the client or user wants something new.
- More confidence: you always know what the next step is, which keeps motivation high for beginners.
Full-Stack Development Workflow in 7 Easy Steps
Here is the complete workflow in one view. Each step is explained in detail below.
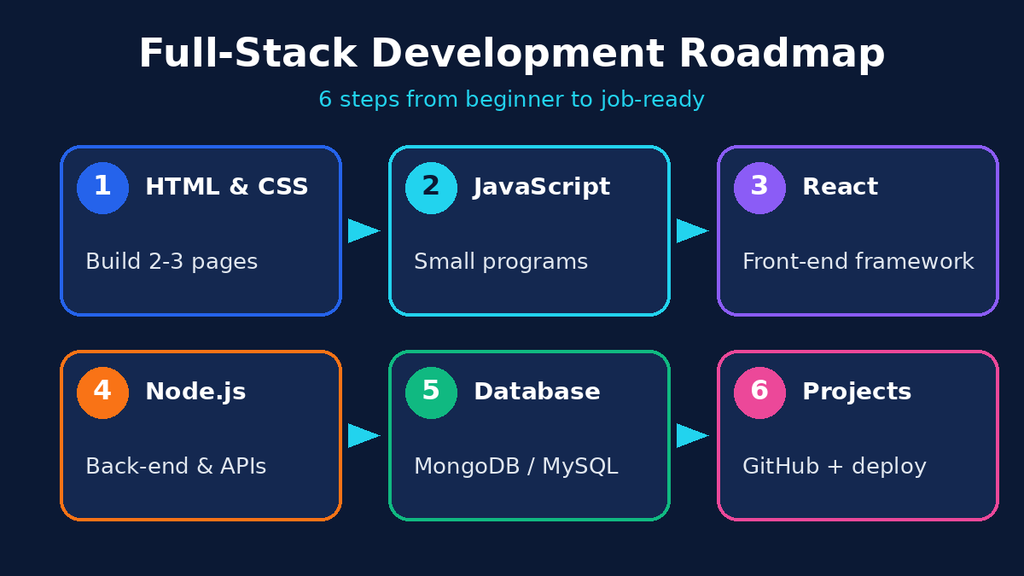
- Plan the project and collect requirements.
- Design the interface, the database and the API.
- Set up the environment and version control.
- Build the back end and the database.
- Build the front end and connect it.
- Test everything.
- Deploy and maintain.
Step 1: Plan the Project and Collect Requirements
Every good project starts with questions. Who will use the app? What problem does it solve? Which features are must-haves and which can wait? Write the answers as a short list of user stories, such as “As a visitor, I can create an account.”
Then choose your tech stack, for example MERN or Django with React. Finally, set a simple timeline with small milestones. A clear plan at the start of your full-stack development workflow prevents most problems later.
Step 2: Design the Interface, Database and API
Design happens on three levels:
- Interface design: sketch each screen with a pencil or a free tool such as Figma. These sketches are called wireframes.
- Database design: decide which tables or collections you need and how they connect, for example users, posts and comments.
- API design: list the endpoints and the data each one sends and receives. This list becomes the contract between the front end and the back end.
Spending a few hours here can save days of fixing later.
Step 3: Set Up the Environment and Version Control
Now prepare your workspace. Install your code editor, runtime and database, and create a project folder with separate areas for the front end and back end. Most importantly, start a Git repository on day one.
Git records every change you make, so you can go back if something breaks. Hosting your code on GitHub also gives you a backup and a public portfolio. The official Pro Git book is a free and trusted guide.
Step 4: Build the Back End and the Database
Many developers start with the back end because the front end depends on its data. Create the database, write the models and then build the API endpoints one at a time. Add validation, so the server rejects wrong or empty data, and add authentication for private features.
Test each endpoint with a tool like Postman as soon as you finish it. Small, tested pieces are easier to trust than one big untested block.
Step 5: Build the Front End and Connect It
With a working API, you can build the screens from your wireframes. Create reusable components, style them with CSS and then connect them to the back end with fetch or Axios. Show loading messages and friendly errors, so users are never left guessing.
This step of the full-stack development workflow is where integration happens, so keep your API list nearby. If you get stuck, our post on Front-End and Back-End Integration explains each connection point.
Step 6: Test Everything
Testing is not an extra step at the end of a full-stack development workflow. It should happen all the time, but this stage is the full check before release. There are four main kinds:
- Unit tests check one small function, such as a price calculator.
- Integration tests check that the front end, back end and database work together.
- End-to-end tests act like a real user, clicking through the whole app.
- Manual testing means you try the app yourself on different browsers and phone sizes.
Fix every serious bug before moving on.
Step 7: Deploy and Maintain
Deployment means putting your app on the internet. Common choices are Vercel or Netlify for the front end and Render or a cloud server for the back end. Set environment variables for secrets such as database passwords, and never put them in your code.
After launch, the work continues. Watch for errors, collect feedback, fix bugs and add new features in small releases. Many teams use CI/CD, which means that tests and deployment run automatically every time new code is pushed.
Tools Used in a Full-Stack Development Workflow
Each stage has tools that make the job easier. This table gives a simple starting kit.
| Stage | Free tools to use |
|---|---|
| Planning | Notion, Trello, Google Docs |
| Design | Figma, draw.io |
| Setup and version control | VS Code, Git, GitHub |
| Back end and database | Node.js, Express, MongoDB or PostgreSQL, Postman |
| Front end | React, Tailwind CSS, browser DevTools |
| Testing | Jest, Cypress |
| Deployment | Vercel, Netlify, Render, GitHub Actions |
You do not need all of these tools to start your full-stack development workflow. Choose one tool per stage and learn it well.
A Simple Git Workflow for Beginners
Git is the backbone of any modern full-stack development workflow. This beginner-friendly routine keeps your code safe:
bash
git checkout -b feature/login-page
git add .
git commit -m "Add login form and validation"
git push origin feature/login-page
First, create a new branch for each feature. Then save your work in small commits with clear messages. Finally, open a pull request on GitHub so the code can be reviewed and merged into the main branch. GitHub Flow explains this process in a few short pages.
Waterfall vs Agile in Full-Stack Development
Teams usually follow one of two styles when they organise a full-stack development workflow.
| Feature | Waterfall | Agile |
|---|---|---|
| Structure | One stage after another | Short cycles called sprints |
| Changes | Hard to change late | Easy to adjust each sprint |
| Feedback | Mostly at the end | Frequent during the project |
| Best for | Fixed, well-known requirements | Most modern web projects |
Most web teams prefer Agile, because requirements often change. As a beginner, you can use a light version: pick one small feature, build it from design to test, and then start the next one.
A Real Example: Building a Simple Blog App
Let us apply the full-stack development workflow to a small blog application.
- Plan: visitors can read posts, and the admin can write and edit posts.
- Design: sketch the home page and post page, create
usersandpostscollections, and list endpoints such asGET /api/postsandPOST /api/posts. - Set up: create a Git repository with
clientandserverfolders. - Back end: build the posts API and add admin login.
- Front end: create the post list, the post page and the admin form, then connect them to the API.
- Test: check that only the admin can create posts, and try the site on a phone.
- Deploy: publish the front end on Vercel and the back end on Render, then fix any bugs found by real visitors.
A project like this teaches every stage of the full-stack development workflow in one place, which makes it a great first portfolio piece.
Common Mistakes in the Full-Stack Development Workflow
Most beginners fall into the same traps. Avoid these:
- Skipping the plan: starting to code without a feature list leads to messy rewrites.
- Building the front end first with fake data forever: connect the real API early to find problems sooner.
- Ignoring Git until the end: commit from the first day, so you never lose work.
- Testing only at the finish line: test each feature as you build it.
- Hard-coding secrets: keep passwords and keys in environment variables.
- Trying to build everything at once: release a small version first and improve it.
Best Practices for a Smooth Workflow
These habits make any full-stack development workflow stronger:
- Break large features into small tasks that take a few hours each.
- Write clear commit messages that explain what changed and why.
- Keep the API documentation updated while you build.
- Review your own code before asking others to review it.
- Automate repeated jobs, such as testing and deployment, with CI/CD.
- Take notes about problems and solutions, so you do not solve them twice.
Frequently Asked Questions
What is a full-stack development workflow in simple words?
It is the ordered list of steps a developer follows to build a web app, from planning and design to coding, testing and release.
How many steps are in a full-stack development workflow?
Teams use different numbers, but seven steps cover the whole process: plan, design, set up, build the back end, build the front end, test and deploy.
Should I build the front end or back end first?
Both orders work. Many developers build the back end first because the front end needs its data, but you can also start with the interface and use temporary data.
Which tools do I need for a full-stack development workflow?
A code editor, Git and GitHub, a database, an API testing tool and a hosting platform are enough to start.
How long does a small full-stack project take?
A small app like a blog or to-do list usually takes one to three weeks for a beginner who studies one or two hours a day.
Conclusion
A full-stack development workflow turns a big, scary project into a series of small, clear steps. Plan first, design the interface, database and API, set up Git, build the back end, connect the front end, test thoroughly and deploy with care. Practise this routine on a small project, and every future project will feel organised and manageable.